If you’re tackling a DIY plumbing project, let us offer a piece of advice learned the hard way:
Sometimes the cheaper option ends up costing more.
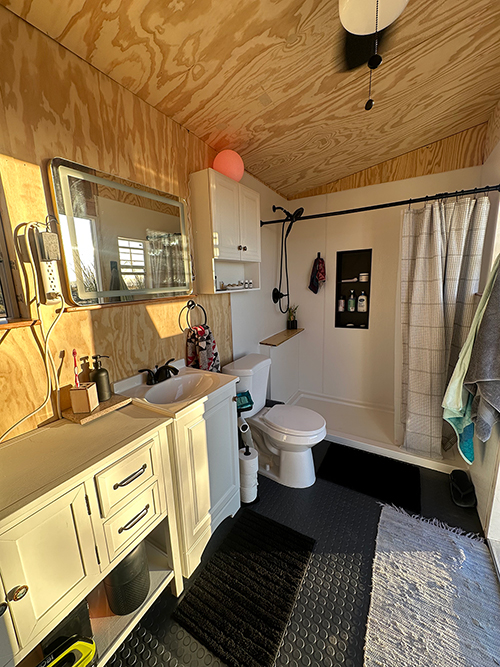
We learned this lesson while building plumbing systems for two different projects. The first was our camper van. The second was our off-grid bathroom. The first time around we cut corners. The second time we relied on SharkBite push-to-connect fittings, and the difference was night and day.
DIY Plumbing Materials List (SharkBite PEX System)
First things first, if you’re building a PEX plumbing system using SharkBite push-to-connect fittings, here are the materials we used for our off-grid bathroom build.
SharkBite fittings (~$327)
- SharkBite 90° elbows
- SharkBite tee fittings
- SharkBite male and female adapters
- SharkBite shutoff valve
- SharkBite toilet connector
- SharkBite hose bib connection
PEX pipe (~$19)
- ½-inch red PEX pipe
- ½-inch blue PEX pipe
Tools and sealants (~$15)
- PEX pipe cutter
- PTFE (Teflon) tape
- Thread sealant with PTFE
Brass components (~$60)
- 1-inch brass foot valve
- Brass nipple
- Brass reducer fitting
Total plumbing materials: about $420
Now that you know what went into the plumbing system, here’s the story behind why we chose SharkBite fittings in the first place.
Our First DIY Plumbing Shortcut and Failure
When we built the plumbing system in our camper van, we were trying to keep costs down wherever we could.
Instead of installing PEX with SharkBite fittings, we used plastic tubing secured with traditional hose clamps. At the time it seemed like the smart DIY decision. The materials were inexpensive and easy to install.
For a while, it worked.
But over the next few years, the tubing slowly began to weaken. Temperature changes, vibration from driving, and simple wear gradually thinned the plastic walls.
Eventually, one of the lines sprang a leak.
Anyone who has dealt with a water leak inside a van knows how quickly that turns into a headache.
Rather than patching the system again, we decided to rebuild it properly.
Discovering SharkBite Push-to-Connect Fittings
When we rebuilt the plumbing system in the van, we switched entirely to PEX pipe and SharkBite push-to-connect fittings.
The installation felt almost too easy. You cut the pipe, push it into the fitting, and that’s it. No clamps. No crimping tools. No guessing whether a connection is tight enough.
One important tip: make sure you feel two “clicks” when inserting the pipe into the fitting. If the pipe isn’t fully seated, you’ll know immediately when the water turns on because the fitting will leak.
When done correctly, the fitting locks instantly and creates a leak-free connection.
This process changed our approach to DIY plumbing, so when it came time to build the plumbing system for our off-grid bathroom, we already knew what we would use.
Planning the Plumbing for Our Off-Grid Bathroom
Going into the bathroom build, we knew two things:
- PEX pipe is cheap.
- SharkBite fittings are not.
PEX costs only a few dollars per section, but the push-to-connect fittings can add up quickly depending on how many turns, tees, and valves your system requires. Still, after our experience with the van plumbing, we decided the ease and reliability were worth the investment.
We budgeted about $500 for the plumbing system, including pipe, fittings, valves, and tools.
In the end, we came in just under that budget thanks to the 10% military discount at Home Depot (thanks to Luke’s service in the U.S. Navy).
In total, the plumbing materials themselves totaled about $420, and the breakdown actually tells a helpful story.
What the Plumbing System Actually Cost
Here is roughly how the costs broke down for the water supply plumbing in our off-grid bathroom.
SharkBite Fittings: About $327
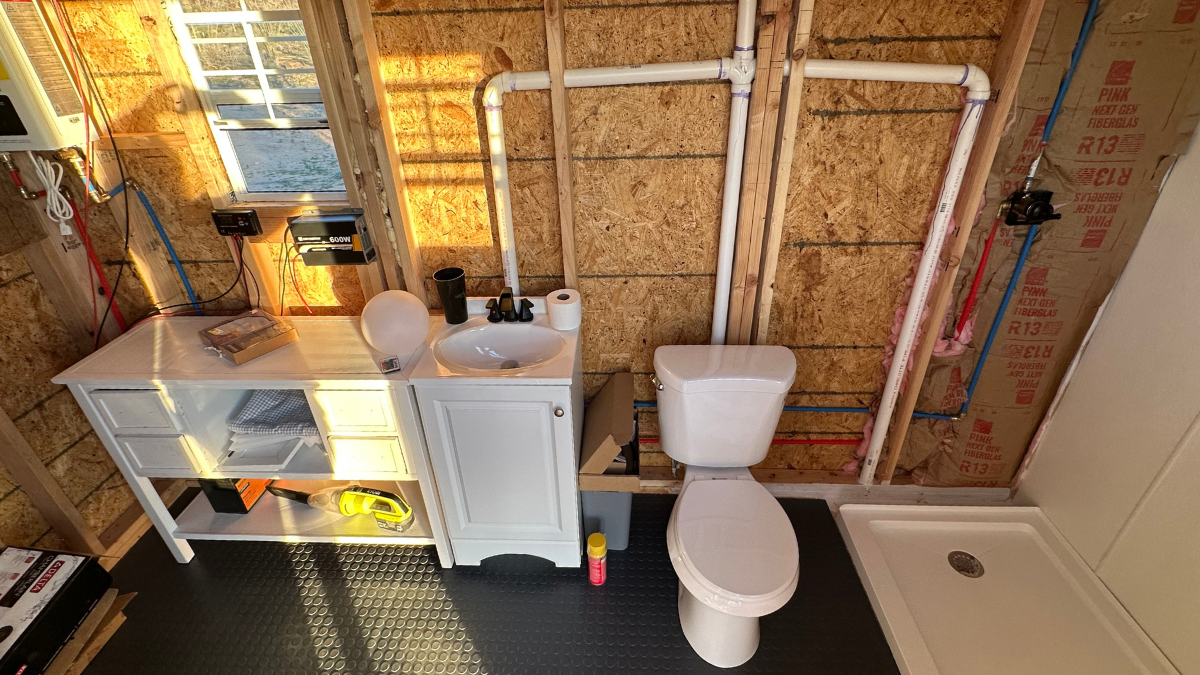
Most of the budget went toward the SharkBite fittings themselves. These included a mix of elbows, tees, adapters, valves, and connectors needed to route water through the bathroom walls.
Some of the key pieces included:
- SharkBite 90-degree elbows
- SharkBite tee fittings
- SharkBite male and female adapters
- SharkBite shutoff valves
- A SharkBite toilet connector
- A SharkBite hose bib connection
Altogether, the SharkBite fittings totaled about $327. That may sound like a lot, but when you consider how many connections are involved in a plumbing system, it adds up quickly.
PEX Pipe: About $19
This is where things get funny.
The actual PEX pipe, which carries the water through the entire system, cost less than twenty dollars.
We used both red and blue ½-inch PEX lines for hot and cold water, and each 10-foot section was only $4.73 before tax.
It’s a good reminder that the fittings, not the pipe, are where most plumbing budgets go.
Tools and Sealants: About $15
We only needed a few additional items to install everything:
- A PEX pipe cutter
- Teflon tape (PTFE tape)
- Thread sealant
Altogether, those supplies cost about $15. While the PEX pipe cutter is not required, it did make cutting the PEX cleanly much easier. We did not use the PEX pipe cutter for the camper van re-plumb, and it did make for some unclear cuts that were more difficult to insert into the fittings.
We actually skipped the SharkBite disconnect tool. For the few times we needed to remove a fitting and redo a section, a crescent wrench worked just fine.
Brass Components: About $60
The system also required a few brass components that weren’t SharkBite fittings, including:
- A 1-inch brass foot valve
- A brass nipple
- A reducing brass fitting
Those parts added about $60 to the total.
The Unexpected Challenge: Drilling Through Studs
Ironically, the plumbing connections turned out to be the easiest part of the entire process. Running the lines through the framing was the real headache.
We had to drill what felt like dozens of holes through wall studs to route the PEX pipe through the bathroom structure. At several points we hit hidden screws from previous construction, which meant backing out drill bits, moving holes, and rerouting sections of pipe.
It quickly became one of those projects where every step took longer than expected.
And that’s exactly when we were grateful we chose SharkBite fittings.
With everything else fighting us during installation, it was incredibly reassuring to know that the plumbing connections themselves were simple and reliable. Push the pipe in. Done.
No tightening clamps. No worrying about leaks. No second-guessing the connection.
Why SharkBite Is Worth It for DIY Plumbing
SharkBite fittings are undeniably more expensive than traditional plumbing connections.
But after working on multiple DIY plumbing systems, we can confidently say they are worth the investment, especially for amateur builders like us. They simplify the installation process, dramatically reduce the chances of leaks, and make it easy to adjust the system if you need to redo a section.
When you are already dealing with framing, drilling, measuring, and routing pipe through walls, having idiot-proof plumbing connections is a huge relief.
From one DIY plumber to another, our advice is simple:
If your budget allows it, use SharkBite fittings from the start.
Your future self will thank you.